Previously …
We connected to our local JSON server using a console app, writen in Swift: Making a connection using Swift
In this article, we are going to do the same thing, this time using C++.
Libraries
Swift comes with a large library of functionality, including classes to connect to a REST server.
The standard C++ library comes with a lot of functionality, but it does not have a library for connecting to a web server.
For that, we are going to use the CPP REST SDK by Microsoft, formally known as Casablanca.
Since this library handles connections to a REST server, in an asynchronous fashion, that is similar to our Swift example, it was natural to choose this library.
Set up
Open up your favorite terminal app.
We going to install cpprestsdk using Homebrew:
$brew install cpprestsdkThe CPP REST SDK reliese on the Boost library and the OpenSLL library to do it’s work.
Boost is a collection of C++ header files, some of which have been adopted into the C++ standard.
To install the Boost libraries using Homebrew, type:
$brew install boostIf you prefer to download the Boost library from source and build it yourself, you can do that; if you would like an example of how to do that, I’ve created a build script for macOS: Build Boost library.
The other library you are going to need is OpenSSL. Using Homebrew, the command is:
$brew install opensslLike Boost, I created a shell script you can use to build and install the library: Build OpenSSL library.
With the libraries installed, or built, you can proceed to create a console app to exercise connecting to our REST server.
Developer Side Note
There are a lot of ways to get a library into your project.
One way, is to simply download the source code, then “make” and “make install” the library at the command line.
Another way, is to create a bash shell script, to do the same thing, but this time, the process is automated.
Another, maybe easier way, is to use a Package Manager. There are several package managers available, which make installing a library easier, than if you were to do it by hand.
In this article, I reference Homebrew, which is a macOS/Linux Package Manager.
Though this is a very popular package manager, it does not have support for Microsoft Windows.
Microsoft has announced, a Cross-Platform package manager, for C++, which will run on Windows, Linux and macOS, but, since I have not evaluated their solution, it was not intruduced as a means in this article.
Probably, in later articles, I may use vcpkg, if it delivers on all of it’s promises.
But for now, we will use Homebrew.
Creating the console app in Xcode
Launch Xcode, then create a new project using
- Select “Create a new Xcode project” from the “Welcome to Xcode” window, OR
- File -> New -> Project menu item, OR
- ⌘ + Shift + N
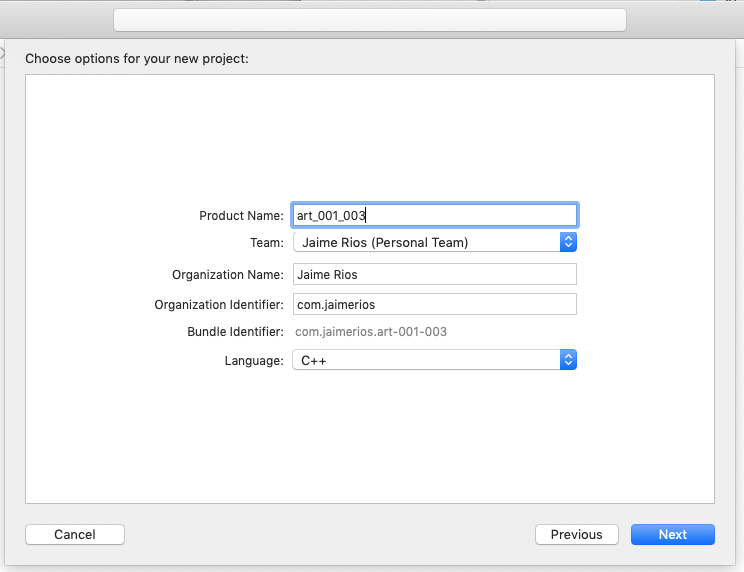
Select “Command Line Tool”

Enter in the name for your app. You can leave the organization name to the defaults. Make sure C++ is selected as the language.
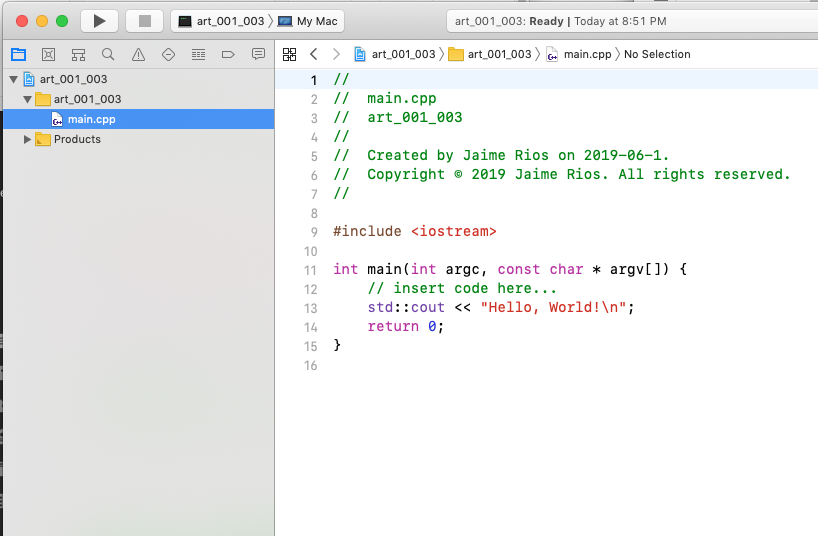
We are presented with a basic console app project; the file that you are interested in is main.cpp.
Another Developer Side Note
There are many ways to create a console app on macOS; you are not limited to Xcode.
For example, you can use Visual Studio Code, install the C++ extension and the C/C++ Project Generator to create a C++ project and debug your code.
However, installing and setting up Visual Studio Code is outside the scope of this article, so, Xcode it is for this article.
Connecting to REST server
To connect to the local JSON server, we are going to:
- Create a HTTP client
- Create a response handler
- Assign a lambda to handle the HTTP response
- Create a nasty loop
So here’s the code to accomplish these steps:
// The C++ STD Library headers
#include <iostream>
#include <string>

// The Microsoft Headers
#include <cpprest/filestream.h>
#include <cpprest/http_client.h>

using namespace std::string_literals;

// The address to our server
const auto server_url = "http://localhost:3000"s;

// Function that will attempt to connect to a REST endpoint
void connect_to_server()
{
  // The connection to our server
  auto client = web::http::client::http_client(server_url);
  auto response = client.request(web::http::methods::GET, U("/events"));

  auto done = false;
  // Assign a lambda to handle the response from the web server
  response.then([&](web::http::http_response response){
    std::cout << "Response lambda called\n";
    done = true;
  });

  // The nasty loop
  while (!done) {
    auto x = 0;
    ++x;
  }
}

int main(int argc, const char* argv[])
{
  std::cout << "Application is starting\n";

  connect_to_server();

  std::cout << "Application will exit now\n";
  return 0;
}
You’ll notice that there is a loop, labeled “The nasty loop”. That was put there to give the CPP Rest SDK enough time to connect to the HTTP server.
If you want to see the code in action, first, you have to make sure your json-server is running.
The json-server installation, and the sample db file was covered in the article, Working with REST
Run through those steps, then open up your favorite terminal app.
cd to the directory where your JSON file is; invoke the following command to start the server:
$json-server --watch db.jsonNow, you can step through the application code to see that it connects to the local server.
Doing more
Now that we can connect to our local REST server, let’s try to download some JSON data.
To do this, we will:
- Create a file_stream, to capture the response from the HTTP REST server
- Create a lambda to handle the response from the server
- Create a lambda to close the file_stream once we are done processing
The code, now looks like:
// Function that will attempt to connect to a REST endpoint
void connect_to_server()
{
  std::cout << "Function connect_to_server called" << std::endl;

  // The connection to our server
  auto client = web::http::client::http_client(server_url);

  // The stream to capture our incoming JSON data
  auto json_data = std::make_shared< concurrency::streams::ostream >();

  //
  // You'll notice that the naming of the following lambda's are verbs,
  // to describe what they intend on doing
  //

  // Lambda to capture the incoming stream and return the client request
  auto create_request = [json_data, &client](concurrency::streams::ostream incoming_data) {
    std::cout << "Lambda request called" << std::endl;
    *json_data = incoming_data;

    // Return a request object, appending the events path component
    return client.request(web::http::methods::GET, U("/events"));
  };

  // Lambda to handle the HTTP response, directing the data to our json_data
  auto handle_response = [json_data](web::http::http_response response) {
    std::cout << "Lambda handle_response called" << std::endl;
    std::cout << "Response status code: " << response.status_code() << std::endl;
    return response.body().read_to_end(json_data->streambuf());
  };

  // Lambda to close the json_data once the stream is done
  auto close_down = [json_data](size_t) {
    std::cout << "Lambda close_down called" << std::endl;
    return json_data->close();
  };

  // The bool to make our code wait
  auto done = false;
  // The lambda that breaks the code out of the nasty loop
  auto signal_done = [&done]() {
    std::cout << "Lambda signal_done called" << std::endl;
    done = true;
  };

  // Now, let's put them all together
  auto output_result_file = concurrency::streams::fstream::open_ostream(U("results.html"));
  output_result_file // This step opens the output file ...
    .then(create_request)
    .then(handle_response)
    .then(close_down)
    .then(signal_done);

  // You should see a pattern here how the process flow works
  // with cpprestsdk

  // The nasty loop
  auto x = 0;
  while(!done){
    ++x;
  }

  std::cout << "Function connect_to_server done" << std::endl;
}
In the above code, a lambda handles each stage of the processing.
Take a look at the results.html file; you should see the JSON data that the server returned.
Now, instead of using the nasty loop, you could just have the connect_to_server function return the task and have the main thread wait on the execution of the task to complete.
// Let's return the task
return concurrency::streams::fstream::open_ostream(U("results.html"))
  .then(create_request)
  .then(handle_response)
  .then(close_down);


// and in the main function, let's wait on the task to finish, wrapped in a try/catch
// block in case something bad happens
try {
  auto task = connect_to_server();
  task.wait();
} catch (...) {
  std::cout << "Something bad happened" << std::endl;
}
Waiting on the task is certainly more convenient than having to use a loop.
So, here is the complete code for the main.cpp file:
// The C++ STD Library headers
#include
#include

// The Microsoft Headers
#include <cpprest/filestream.h>
#include <cpprest/http_client.h>

using namespace std::string_literals;

// The address to our server
const auto server_url = "http://localhost:3000"s;

// Function that will attempt to connect to a REST endpoint
auto connect_to_server()
{
    std::cout << "Function connect_to_server called" << std::endl;

    // The connection to our server
    auto client = web::http::client::http_client(server_url);

    // The stream to capture our incoming JSON data
    auto json_data = std::make_shared< concurrency::streams::ostream >();

    //
    // You'll notice that the naming of the following lambda's are verbs,
    // to describe what they intend on doing
    //

    // Lambda to capture the incoming stream and return the client request
    auto create_request = [json_data, &client](concurrency::streams::ostream incoming_data) {
        std::cout << "Lambda request called" << std::endl;
        *json_data = incoming_data;

        // Return a request object, appending the events path component
        return client.request(web::http::methods::GET, U("/events"));
    };

    // Lambda to handle the HTTP response, directing the data to our json_data
    auto handle_response = [json_data](web::http::http_response response) {
        std::cout << "Lambda handle_response called" << std::endl;
        std::cout << "Response status code: " << response.status_code() << std::endl;
        return response.body().read_to_end(json_data->streambuf());
    };

    // Lambda to close the json_data once the stream is done
    auto close_down = [json_data](size_t) {
        std::cout << "Lambda close_down called" << std::endl;
        return json_data->close();
    };

    // Put them all together and return the task
    return concurrency::streams::fstream::open_ostream(U("results.html"))
        .then(create_request)
        .then(handle_response)
        .then(close_down);
}

int main(int argc, const char* argv[])
{
    std::cout << "Application is starting\n";

    try {
        auto task = connect_to_server();
        task.wait();
    } catch (...) {
        std::cout << "Something bad happened" << std::endl;
    }

    std::cout << "Application will exit now\n";
    return 0;
}
If you would like to see the completed example project, the project from this article, and all of the other ones, are available for download from GitHub: https://github.com/AhiyaHiya/art_2019_05_001
The next article is going to be surprise, but, related to what we are doing with REST.
For more examples on how to use the CPP REST SDK, have a look at samples using CPP REST SDK
Index
Article Series Index